I. Preparation
Required Tools
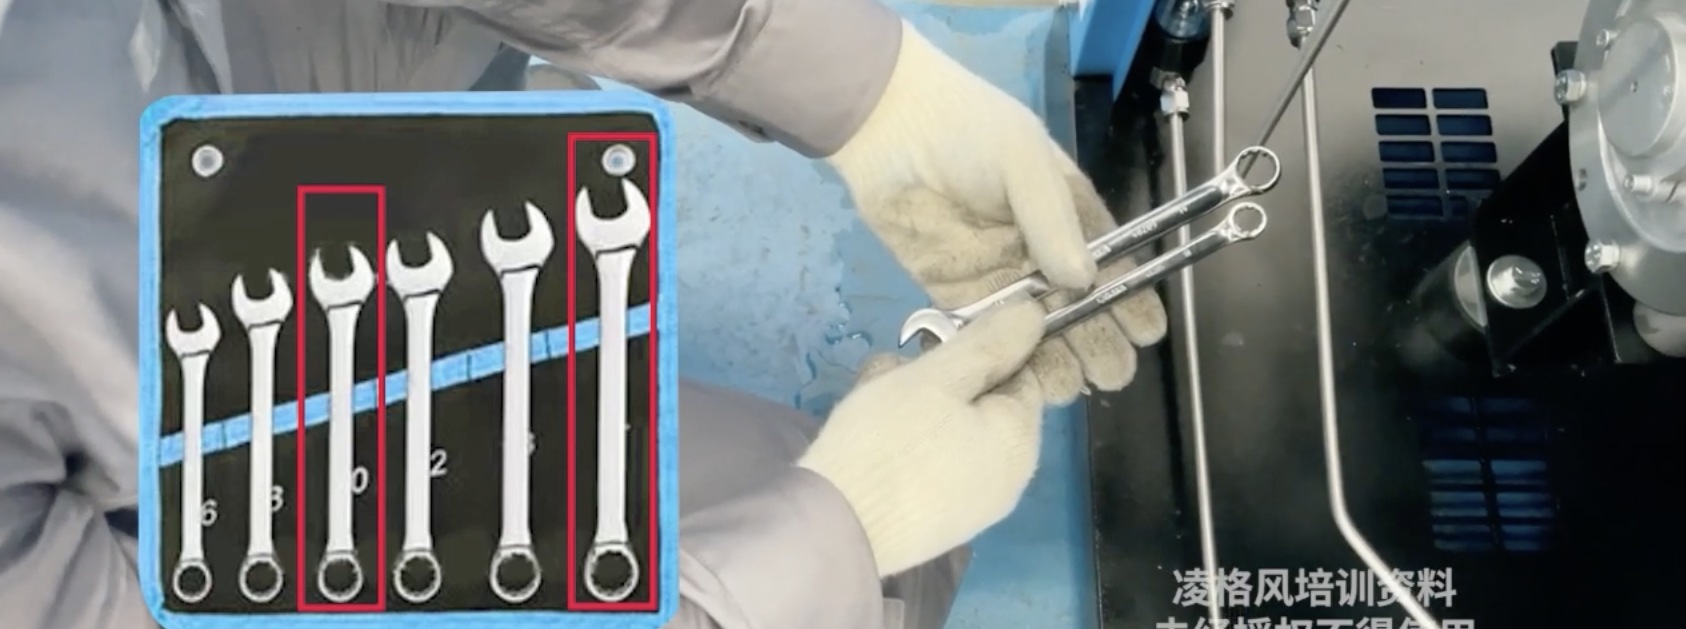
14mm open-end wrench ×1
10mm open-end wrench ×1
Hex key set ×1
Adjustable wrench ×1
Lint-free cloth/wipes
Compressed air gun (optional)
Fine-grit sandpaper (≥800 grit, for metal parts only)
Safety Precautions
1. Disconnect power and depressurize the systembefore starting.
2. Label components during disassembly for proper reassembly.
3. Never use chemical cleaners on rubber seals.
II. General Cleaning Procedure (Standard Solenoid Valves)
Step 1: Disassembly
1. Remove the locknut using a 14mm wrench.
2. Detach the solenoid coil cover and coil assembly.
3. Engage the 10mm wrench on the valve stem while loosening the locknut with the 14mm wrench.
Note: Adjust wrench angles incrementally in confined spaces.
Step 2: Valve Core Cleaning
1. Extract the valve stem and pour out the core assembly.
2. Wipe the core surface with a lint-free cloth.
3. Use compressed air (≤0.3MPa) for stubborn deposits.
4. Inspect spring integrity and ensure proper orientation during reassembly.
Step 3: Reinstallation
1. Hand-tighten the valve stem before final torque application with dual wrenches.
2. Reattach the coil assembly and cover.
3. Perform a no-load test run after completion.
III. Specialized Valve Cleaning
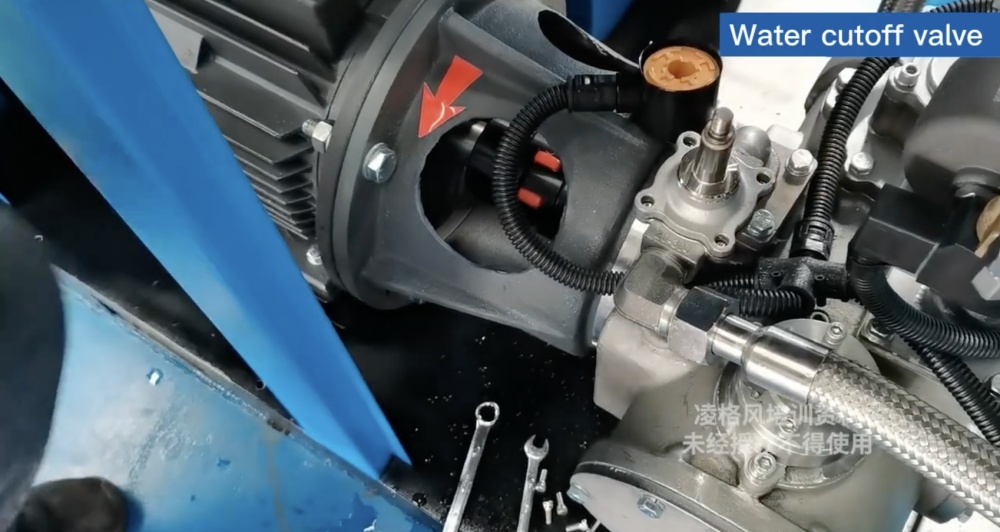
1. Water Cutoff Valve
Critical Rule: Clean rubber seals with water only.
Disassembly:
Remove coil locknut → Extract gasket → Unbolt with hex keys.
Installation:
Apply torque ≤15N·m to avoid seal deformation.
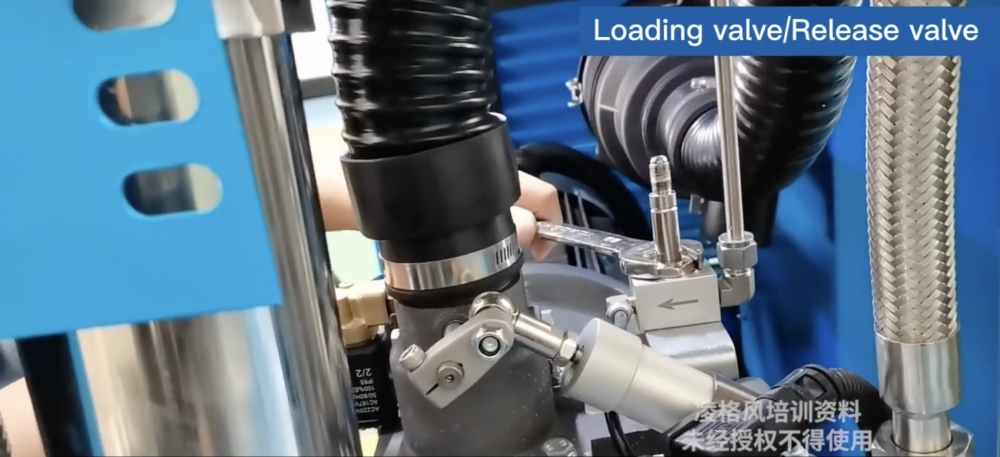
2. Loading valve/Release valve
Power Isolation: Disconnect electrical cables first.
Cleaning Focus:
Purge the valve stem and core with compressed air.
Replace gaskets if warpage exceeds 0.5mm.
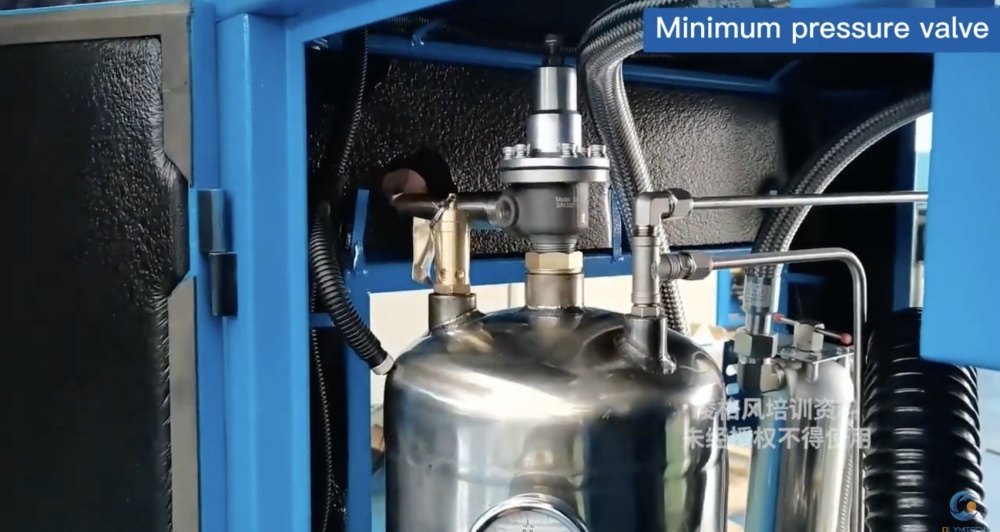
3. Minimum Pressure Valve (MPV)
Disassembly Tips:
Keep two diagonal bolts engaged to prevent sudden release.
Manually stabilize the valve during final bolt removal.
Cleaning Specifications:
|
Component |
Method |
Prohibited Actions |
|
Piston/Spring |
Compressed air purge |
No chemical solvents |
|
Metal Seats |
Unidirectional sanding (≤3 passes) |
Do not adjust calibration bolts |
|
Diaphragm |
Light transmission test + manual inspection |
Replace if micro-cracks detected |
Reassembly:
Tighten flange bolts diagonally in stages.
Conduct pressure tests after reinstalling exhaust pipes.
IV. Maintenance Intervals
|
Operating Condition |
Routine Cleaning |
Comprehensive Service |
|
Water hardness <150ppm |
2,000 hours |
8,000 hours |
|
Water hardness ≥150ppm |
1,000 hours |
4,000 hours |
|
High-temperature (>45°C) |
800 hours |
3,000 hours |
V. Troubleshooting
1 , Stuck Valve Core:
Soak in 40°C deionized water for 30 minutes.
Gently tap the valve housing to loosen.
2 , Minor Leaks:
Verify locknut torque (refer to Appendix).
Apply food-grade silicone grease (≤0.1mm thickness) on metal seals.
Conclusion
Regular solenoid valve maintenance reduces unplanned downtime by over 70%. Maintain a service log to record torque values and component conditions. For complex issues, contact certified technicians immediately.
Appendix: Standard Torque Values (Unit: N·m)
|
Component |
Torque |
|
Solenoid valve locknut |
18-22 |
|
MPV flange bolts |
25-28 |
|
Water shut-off valve bolts |
12-15 |
This guide applies to standard LSW models. Consult specific manuals for customized variants.


Copyright © 2023 Olymtech Technology Development Co., Ltd. All rights reserved. Site Map Designed by 
By continuing to use the site you agree to our privacy policy Terms and Conditions.

 EN
EN

